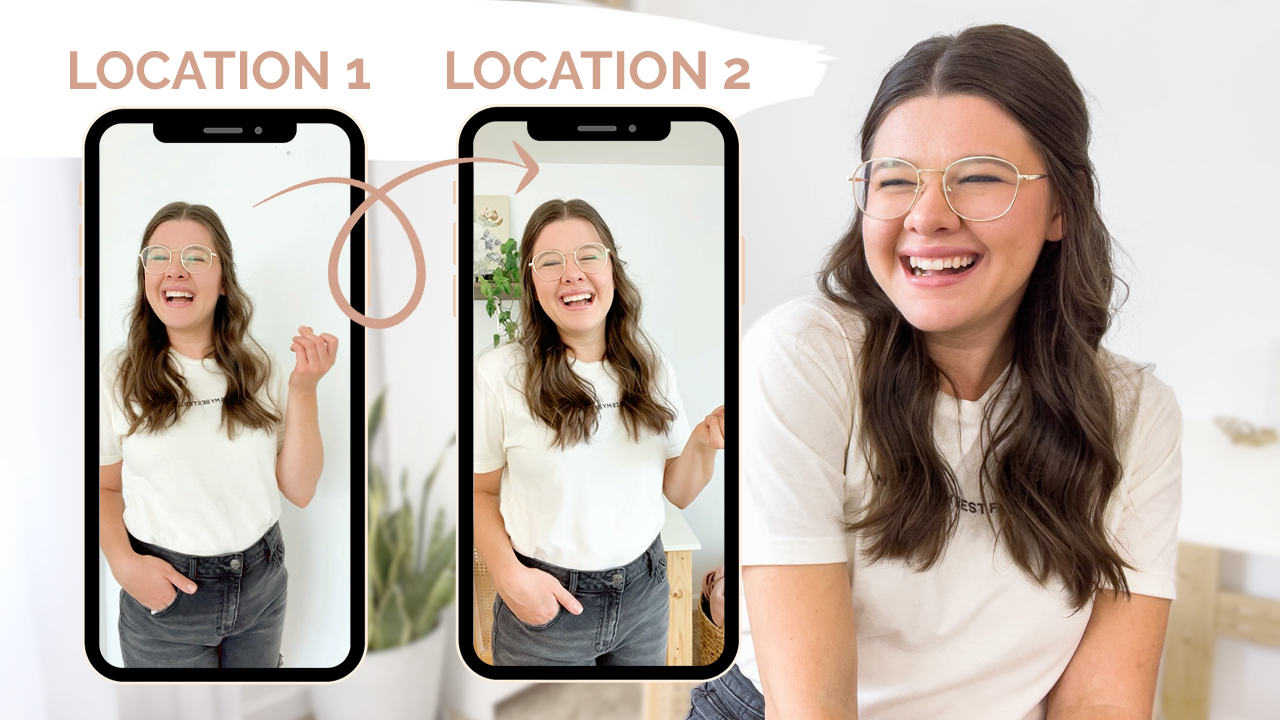
Ever wondered how to create a transition on Instagram Reels between two locations, maybe even on different days? I’m going to show you exactly how to film and create a transition like this – it’s much easier than you think! Grab your phone and your tripod and let’s get going with this walkthrough on how to create Instagram Reels transitions in two different locations.
The First Location
To start filming, I put my phone on my tripod. I’ll be using a blank wall to film the first part of my Reel. This could be anywhere but for the sake of this demonstration, I’ll be using this wall. The idea behind this Reel is that I’ll start in one spot, snap my fingers, and magically be in a new spot! You could use this transition for something that’s filmed on the same day or something that’s weeks apart (maybe like a vacation!). I’m going to film this inside the Instagram Reels app. When you’re ready to film, hit the timer button in the bottom left corner and drag it to 5 seconds. This is how long it’s going to film. It will count down before it starts filming. So, I’ll start at the wall and pose then make sure I snap! When you’re done, hit “save as draft” and it will be saved on your account.
Two quick tips for you: I always leave room after I snap so that I have some extra space when I go to edit! And don’t forget to hit the download button before you leave the app – just in case something happened to your video!
The Second Location
Again, the second location could be filmed on the same day or another day entirely. But, when you’re ready to film the second spot, navigate back to the Reels drafts. Open up the original video in your new location. Hit “edit” in the top right corner and hit the camera icon in the top left corner. Now you’re on the filming page! If you hit the “align” option, you can line yourself back up with your previous video. This will make your transition smoother! Set your timer and film your next snap! Again, I like to give myself some wiggle room at the beginning and end of the transition for editing purposes.
Now that it’s filmed, hit the downward facing arrow so you can trim your footage. If you click your first video and the scissor icon, you can trim your clip. Trim it right after you finish snapping! Then hit the second video and trim this one. Here, I would trim the beginning of the clip to where the snap ended. Basically you’re trying to get the transition to happen right when the snap happens! It’s a little tricky, but watch it back and see what you think. When you’re ready, hit “next’ and you can add your caption, do your cover photo, and all of that! PS, don’t forget about my free Instagram Reels cover photo template and if you need a walkthrough on how to get everything setup, watch my full tutorial HERE!
If you’re looking for more ideas about what to create on Instagram Reels, I’ve got a NEW free resource for you filled with 10 ideas for you! Grab it HERE.


