Alright, friends! Today is for my fellow photographers… I’m going to be talking all about my off camera flash setup I use to get those awesomely lit images at wedding receptions! :) I know it can be SUPER overwhelming trying to figure all this stuff out!! During my first year of business, this was one of the first things I set out to master in my shooting. I knew I had to be prepared for those dark receptions, and over the years, I’ve been able to master flash to match reception images with my light and airy portraits! Hopefully this will help you in getting started in creating some amazing flash images for your clients! :)
Before we get started, feel free to
get part 2 of the tutorial on how I use all of this flash gear at receptions. Fill out the form below or
click this link!
So why use off camera flash?
1. It gives your pictures awesome dimension that one flash on your camera just can’t do!
2. You can feel confident going into ANY reception and getting brightly lit pictures, even if it’s completely dark!
3. Taking reception photos is a thousand times more fun, because you won’t dread taking terrible, grainy photos that take loads of time to edit!
AND, the flash setup I use is SUPER inexpensive and very affordable… so there’s really no reason not to! :)
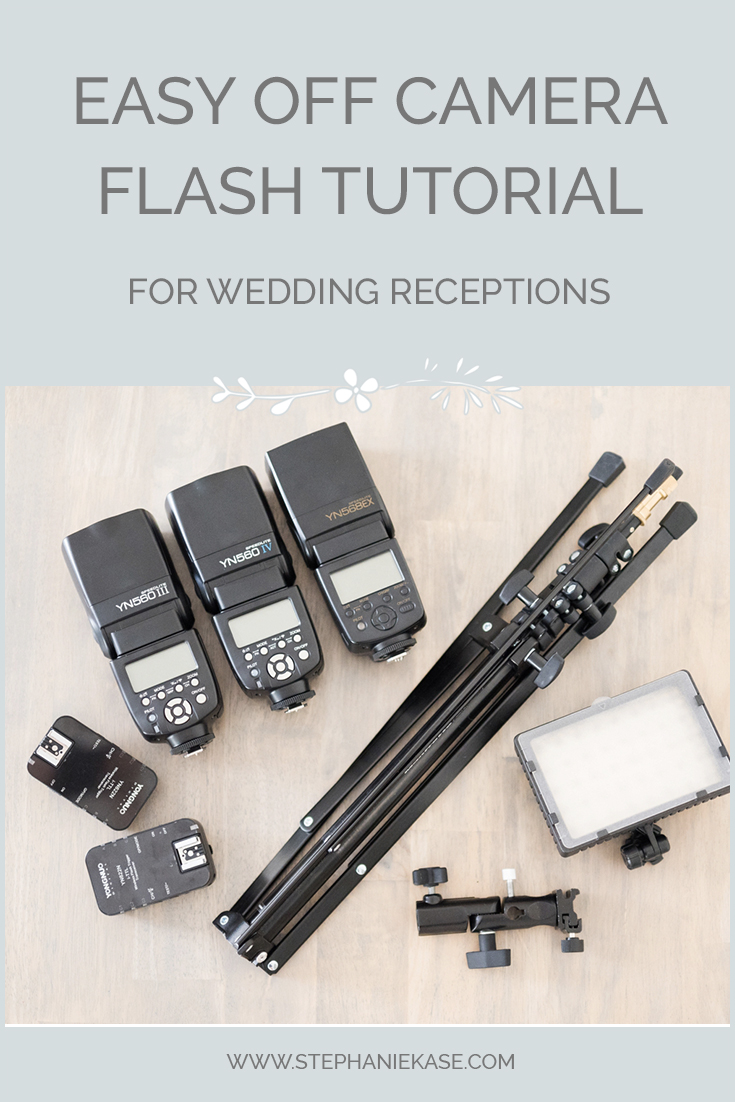
I use flashes by the Yongnuo brand made for Nikon (they also sell the same ones for Canon, so don’t worry!). This model is awesome because it has High Speed Sync, which means you can set your shutter speed at higher than 1/250 if you want to. (Which you don’t really NEED to have it, but it’s nice for crazy dance floors!). I use two of these in total at every wedding: one on my camera, and one off my camera. (Once you’re more comfortable, you can use more than two… but I find it easy to set up and to be plenty of light!)
I use one flash ON my camera (this flash attaches to the “flash trigger” that is attached to my camera… I explain more about this below). I point this flash straight towards the ceiling. In addition, I pop up the white bounce card that comes on the flash (so my bounce card is sticking straight up). This gives a little “pop” of light to the subjects so they’re not completely dark or silhouetted! The problem with pointing the flash straight at your subjects is it makes them EXTREMELY flat and gives them no dimension. So the straight-towards-the-ceiling + white-bounce-card trick fixes this problem.
I use one flash OFF my camera (on a light stand). I point this flash straight at the subject/dance floor/place of action. Recently, I’ve also played around with have TWO off camera flashes instead of just one… but this is definitely more advanced, and I normally use this for larger reception rooms. :) If you’re just starting to figure it out, I would only start with one!
My Flash Settings
The Yongnuo flashes I use are manual. This means I have to set the power settings myself, instead of the camera figuring it out for me! It takes a little figuring out at the beginning, but I actually prefer being able to set it myself. Here’s some guidelines I use for myself to get you started:
My settings for my ON camera flash are usually around 1/16 to 1/64. I usually keep it in this mid range, because while you want to lighten your subjects, if the flash is too bright, it will make them look dull.
My settings for my OFF camera flash are usually at around 1/32 to 1/128. Depending on how far away this flash is from the dance floor is how powerful (the lower the number) you want it. If it’s at a distance, a higher power (or lower number) is required. If it’s right at the edge of the dance floor, a lower power (or higher number) is needed. Be VERY careful at accidentally making this flash too bright, as it can make your images way too bright!
About Yongnuo Flashes
If you’re a little weary of using Yongnuo flashes, let me convince you otherwise. They work JUST as well as main brand flashes from Nikon or Canon. They are JUST as powerful. Nikon and Canon flashes break JUST as easily… I know other photographes who have had their Nikon/Canon flashes break on them very quickly. NOT to say that Yongnuo flashes don’t, but I wouldn’t be worried about their durability. And they’re a fraction of the price!! You can purchase 3 or 4 Yongnuo flashes for the price of ONE comparable Nikon/Canon flash. I’d much rather have an off brand flash + a couple backups that work just as well than pay a ton extra for one main brand flash.
Flash Triggers
Alright, so you’ve got the flashes… but how do I actually make these go “POOF” when I take a picture? And what’s this about attaching a flash trigger AND a flash to your camera… at the same time?! Well, that’s where flash triggers come in!
Why Use Triggers?
I use flash triggers by the same brand (Yongnuo). Although the flashes already have the ability to connect without the triggers, the triggers make it so you can walk farther away or have a lot of people/things in between you and the off camera flash. (Don’t ask me what the technicalities of it is, but it uses a different system of connecting). In other words, if you don’t use triggers, the flashes would always have to be in direct sight of each other in order to fire… which, if you’ve shot at ANY wedding, doesn’t really work out too well at weddings.
Also, these triggers let you have an off camera flash AND on camera flash at the same time. This is HUGE!! The trigger that you put on your camera has a little slot for the on camera flash. It’s very easy to use. And it’s super sweet. The only downside to this is it’s difficult/not smart to tilt your camera to take “portrait” pictures instead of “landscape” pictures. But this normally isn’t a big deal at all for receptions! I’ve never had an issue with it. And the pros far outweigh this con.
Light Stand
So I have my flashes, I have my flash triggers… but wait, but what do I do with the off camera flash so it stays exactly where I want it?!
A light stand is what I use to put the off camera flash on! I highly recommend the one I use. While it’s a little big to carry around, but very heavy duty and works super well. It’s also gives me more peace of mind that no one will unintentionally knock it over while dancing! (Although if you’re super paranoid, you can also get sand bags. But in that case, I would also recommend a backup flash).
The first one I have below is more heavy-duty and durable. It’s definitely not prone to fall over! The second one I have listed is what I have more recently started using, because it folds up and fits in my ThinkTank bag! I still have the other one for a backup, but I currently have two of the compact light stands in my bag. I love how easy they are to transport!
MY COMPACT LIGHT STAND: Manfrotto 5001B Nano Black Light Stand – 6.2′ (1.9m)
Flash Bracket
In order to attach the flash to the light stand, you have to have a flash bracket. It’s a small piece that screws on to the top of the light stand. Then, you can screw your flash on the flash bracket. Make sure to get this!! Your flash won’t attach to your light stand on its own.
What I Paid for Awesome Lighting
My whole set up cost me $350 (two flashes, flash triggers, light stand, and flash bracket), which isn’t bad considering ONE camera flash from Canon/Nikon costs as much as that! The Yongnuo flashes are very reliable and work great!
The only other thing you’ll need is a lot of batteries. :) Each flash takes four and each trigger takes two. I replace them every 1-2 weddings. You can also buy rechargeable batteries, but I’ve heard good and bad things about them! Just make sure to do your research before investing in a lot.
EDIT (October 4, 2017): I decided to invest in Panasonic Eneloop Pro Rechargeable batteries and I am not disappointed!! They have been amazing and save you the cost of buying batteries for every wedding. All you have to do is remember to recharge them!
If you want a FREE comprehensive list of all of the flash gear I use (everything I mentioned in this post and more!) fill out the form below or
click this link!
Full Disclosure: I do receive a small commission off of the links to Amazon if you decide to purchase! If you found this blog post helpful, consider using the links when buying the different gear! :) THANKS!
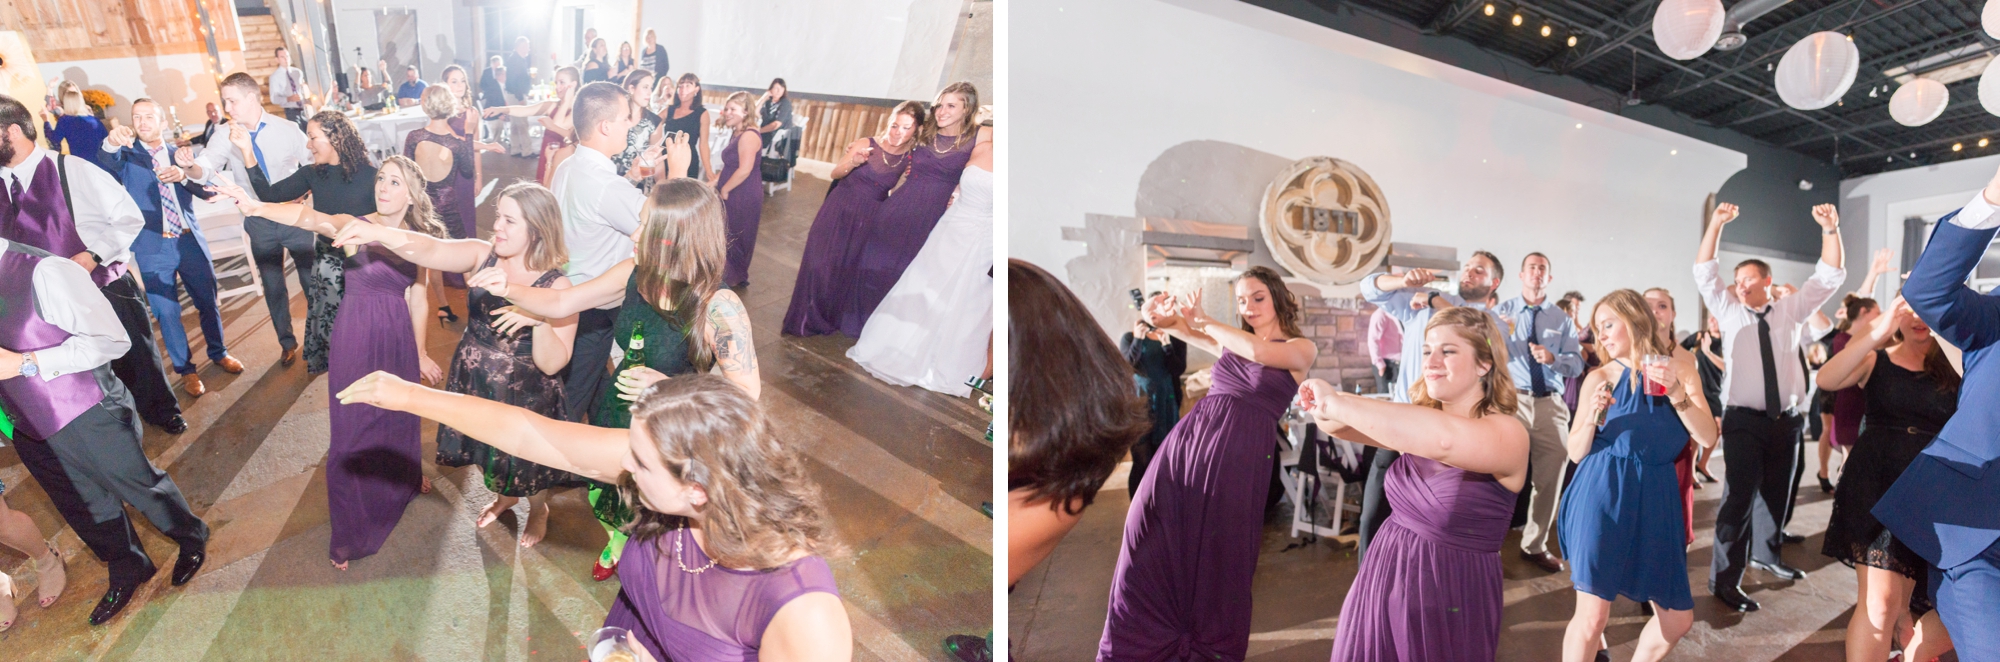
EXAMPLES
So after explaining all this, I thought you might like to see some examples of how I put this into action!
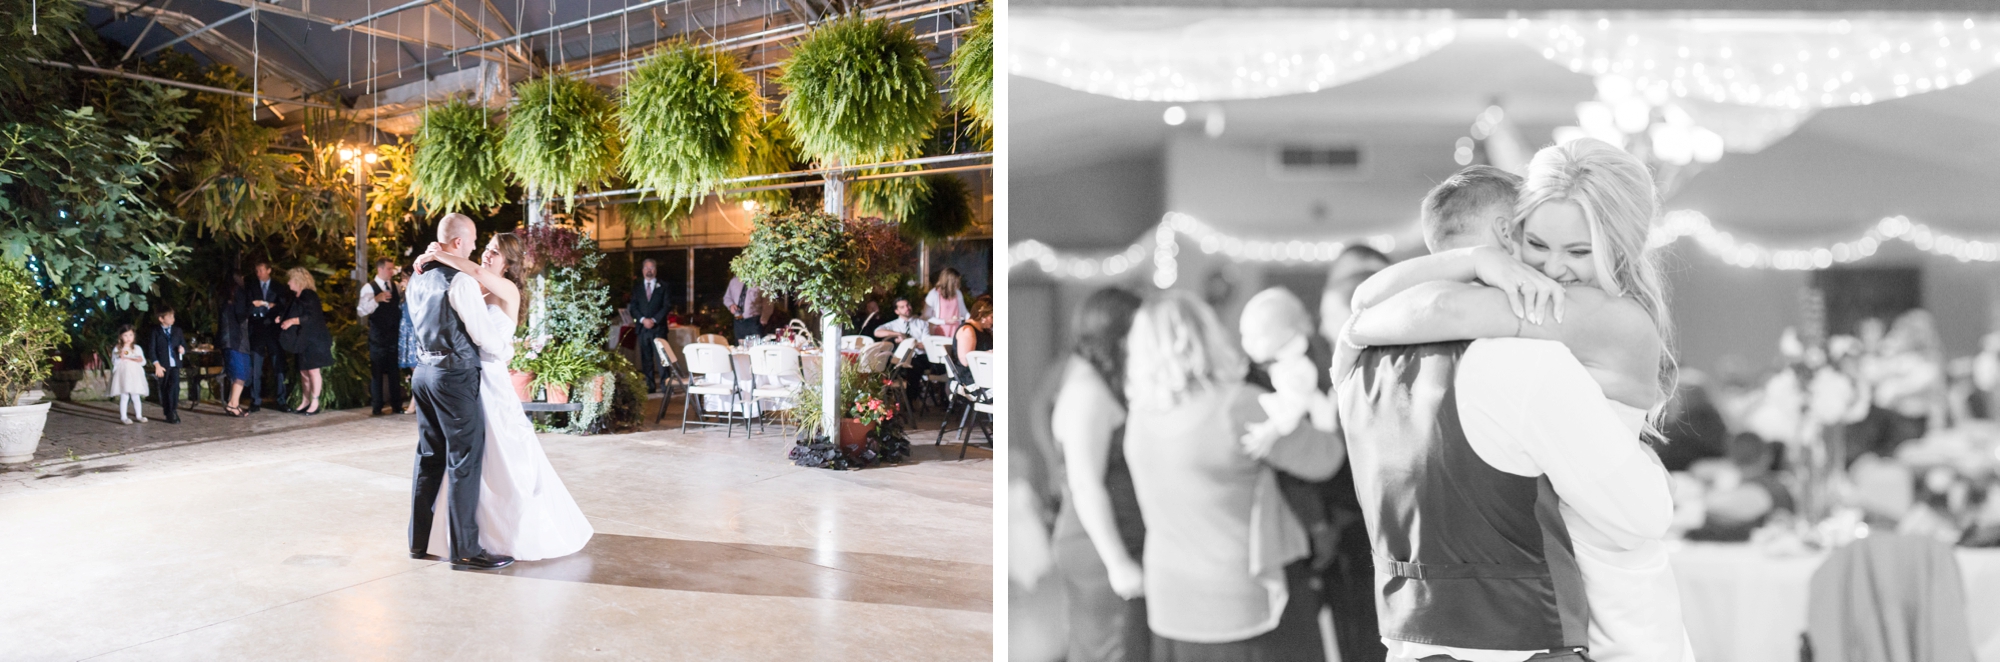
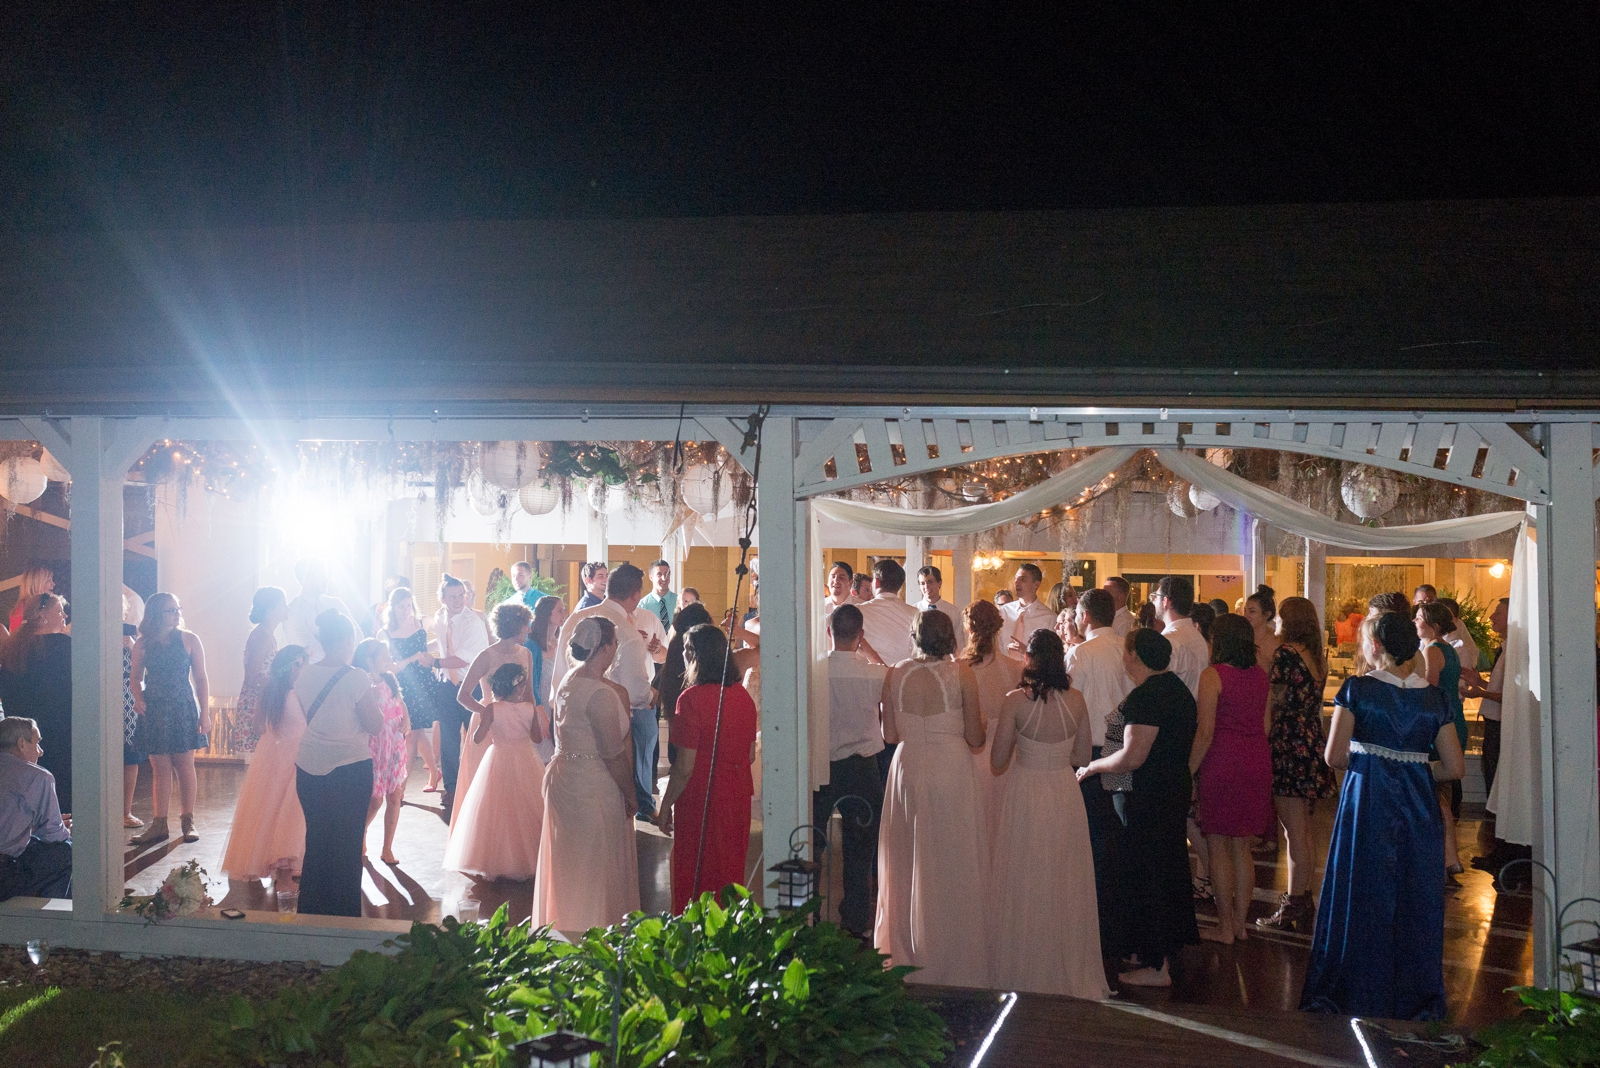
In the following picture, you can see where I placed my off camera flash at this outdoor reception (off to the left). This is pretty typical of how I use my off camera flash at a reception. If it were a little bigger and I needed two, I would probably place the second one off to the far right. :)
Below is the same reception, except this photo is taken from under the pavilion (see how you can tell there’s a light source coming from the right? That’s my off camera flash. And I also have my on camera flash for a bit of “pop” to the subject!):
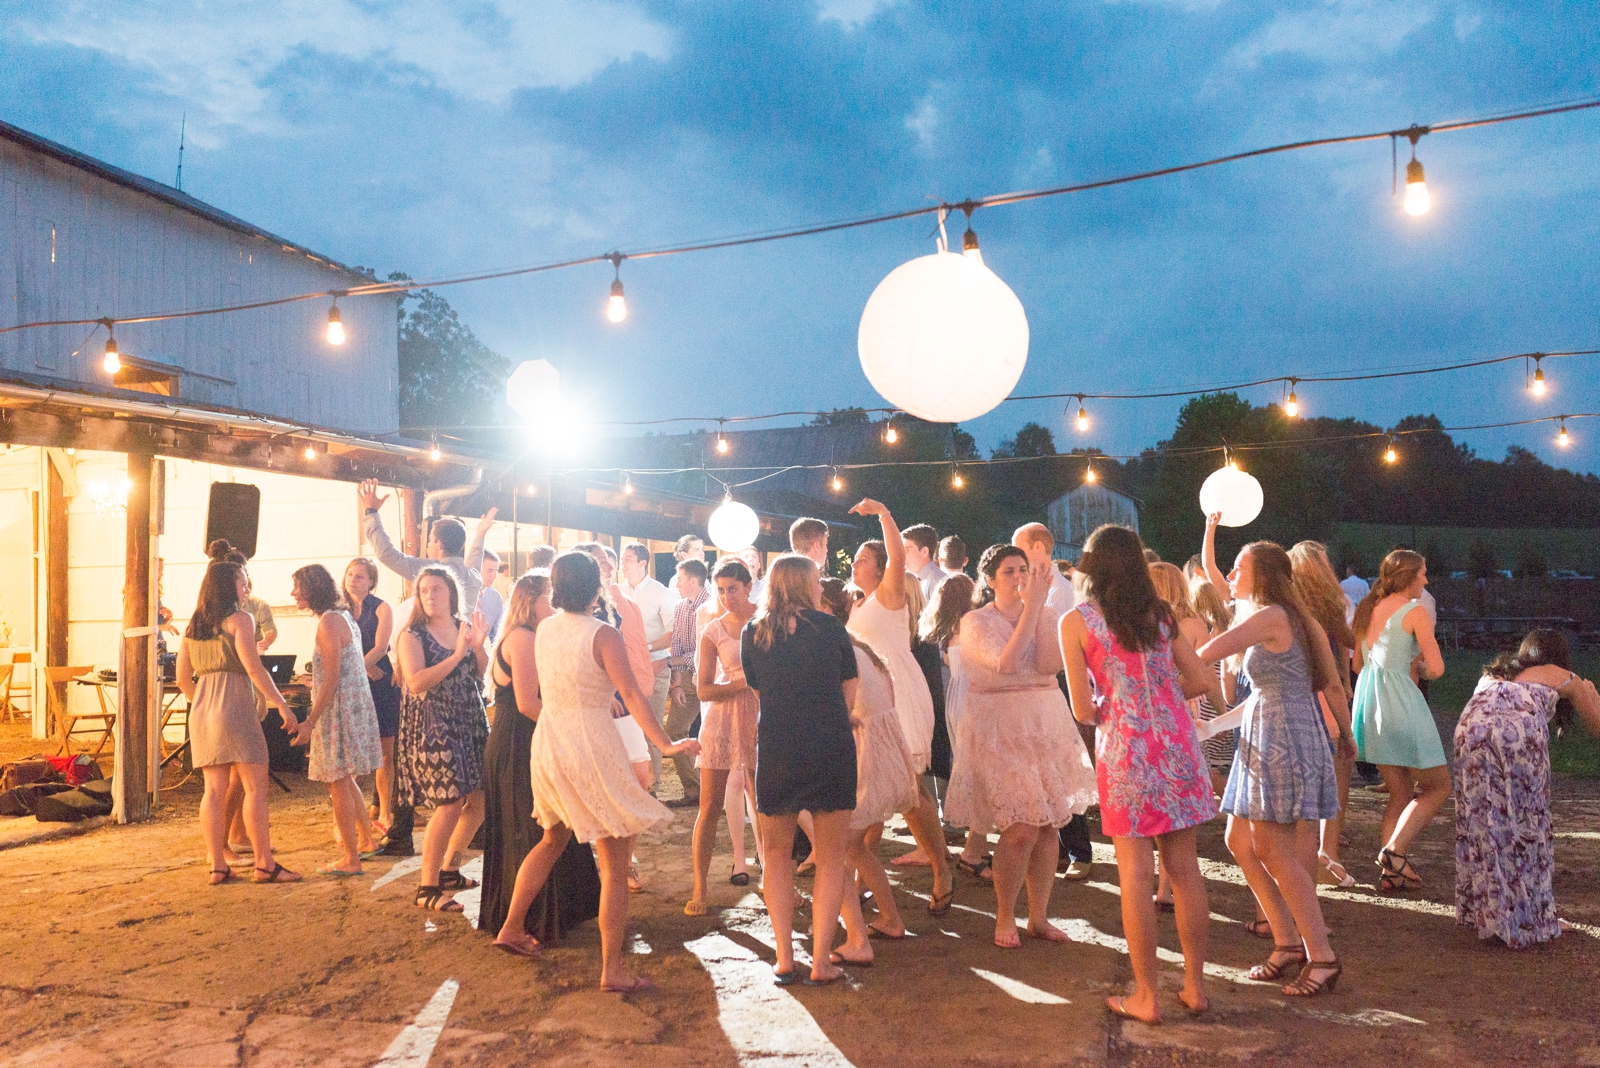
Below is another outdoor reception, with my flash off to the left:
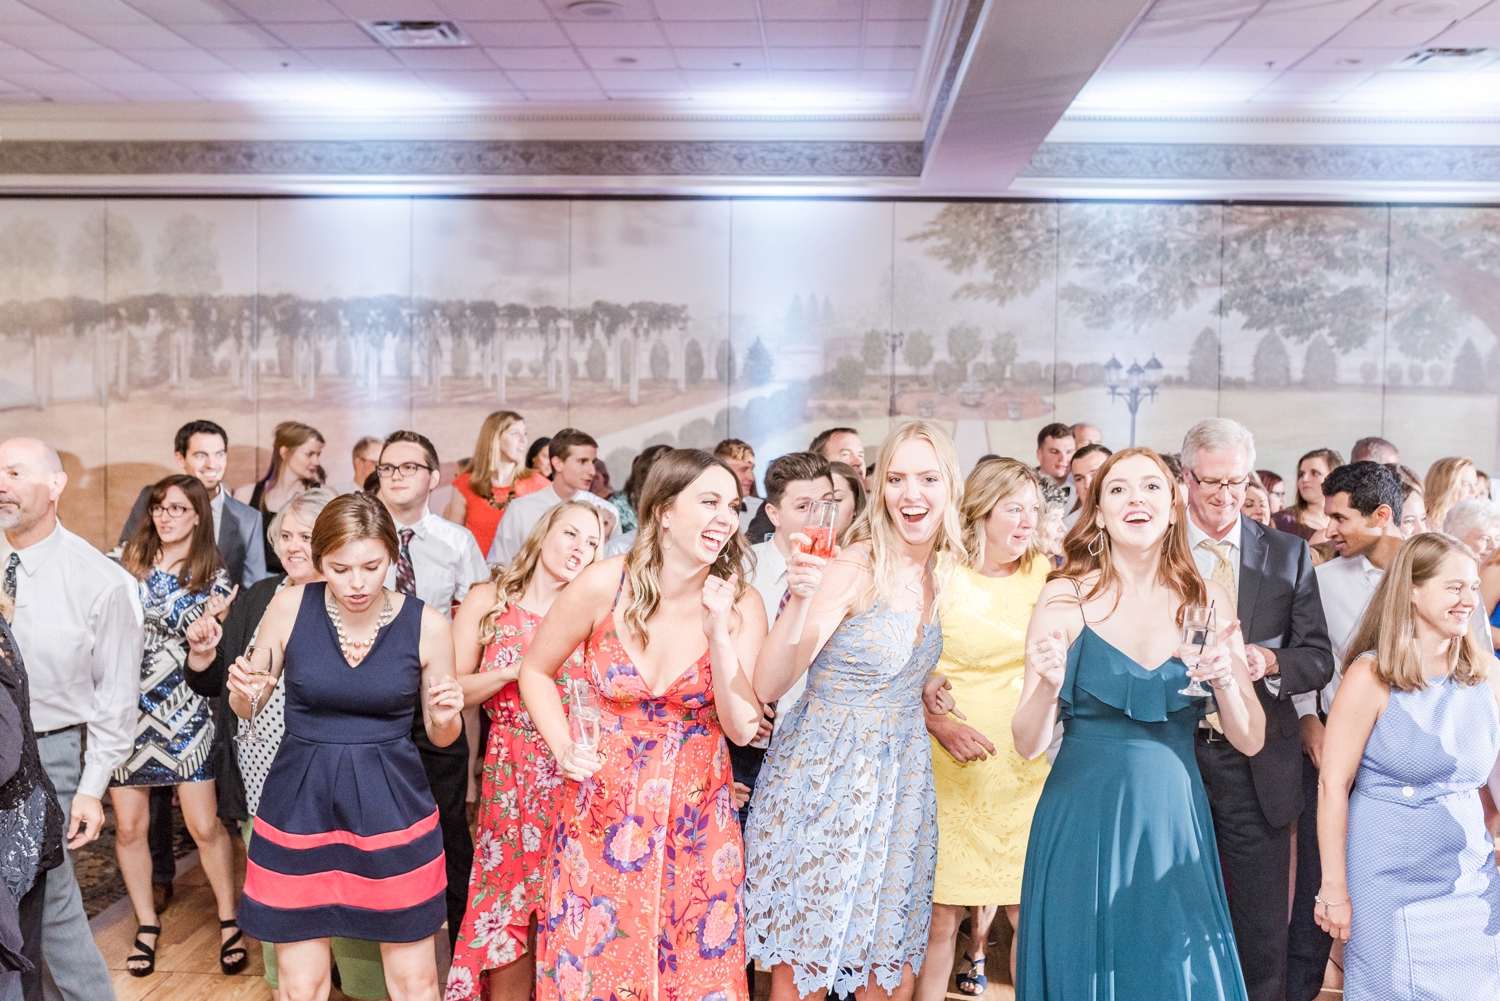
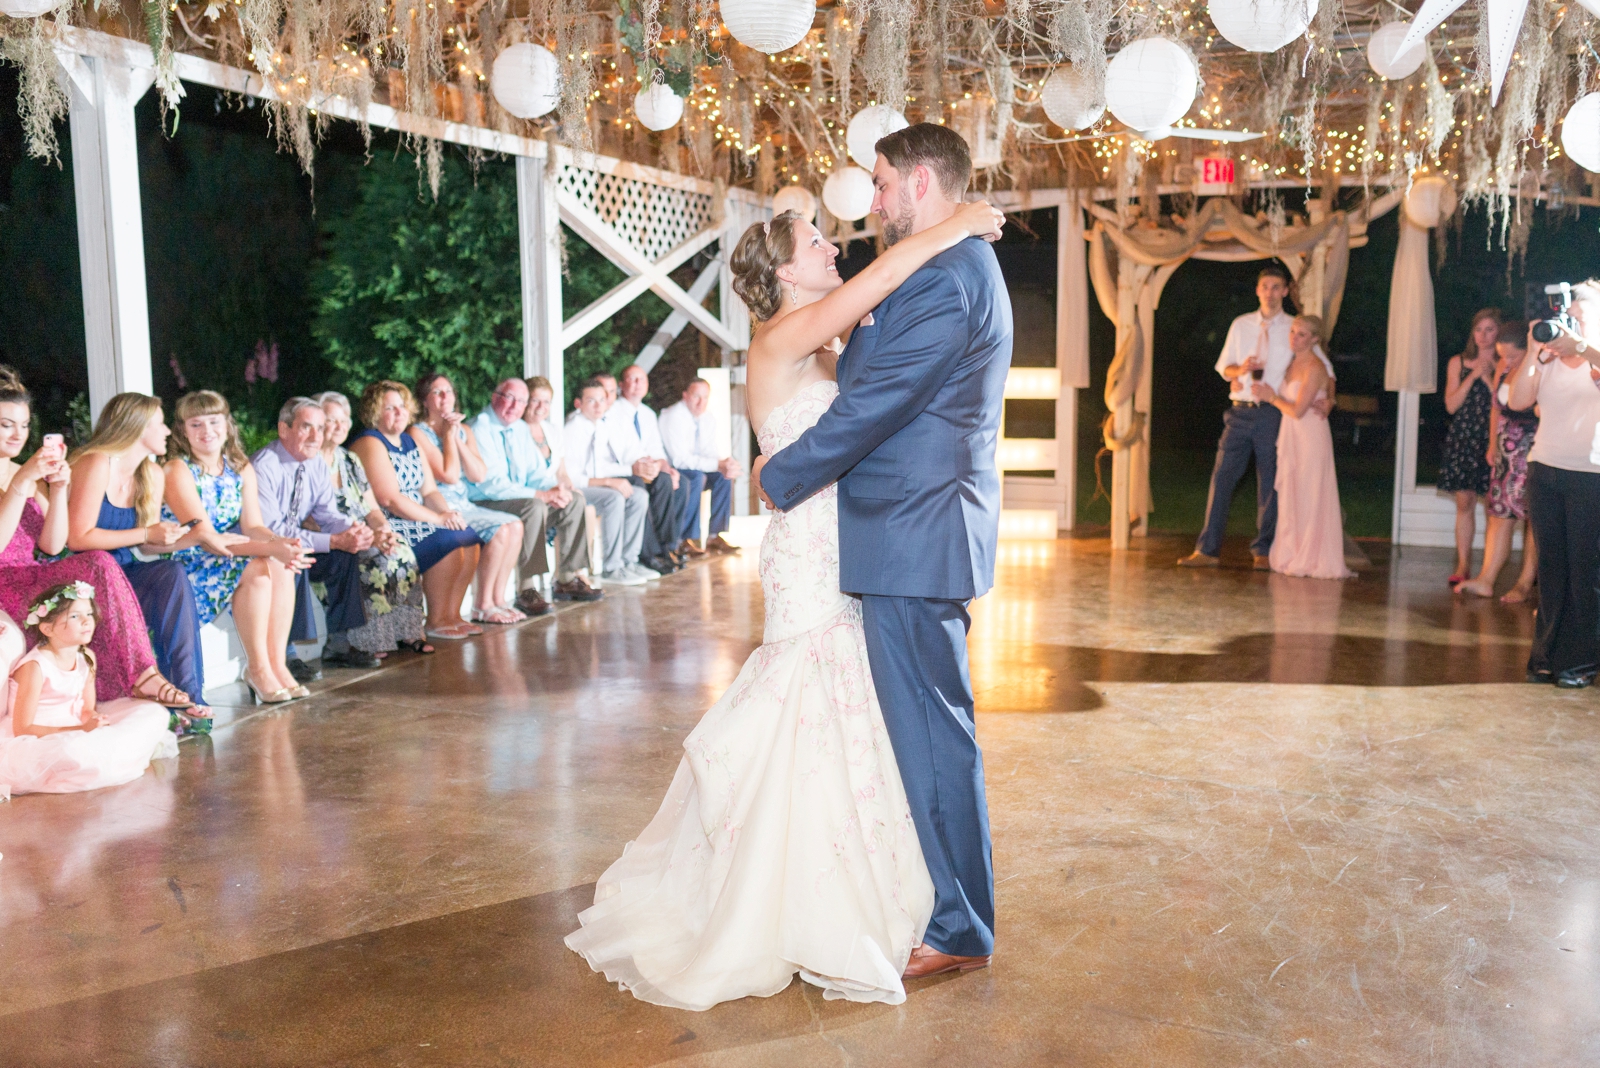
Up close image of the bride & groom dancing at the same reception… See how there is definitely a “pop” to the subjects? And how the off camera flash in the background gives it some awesome dimension?
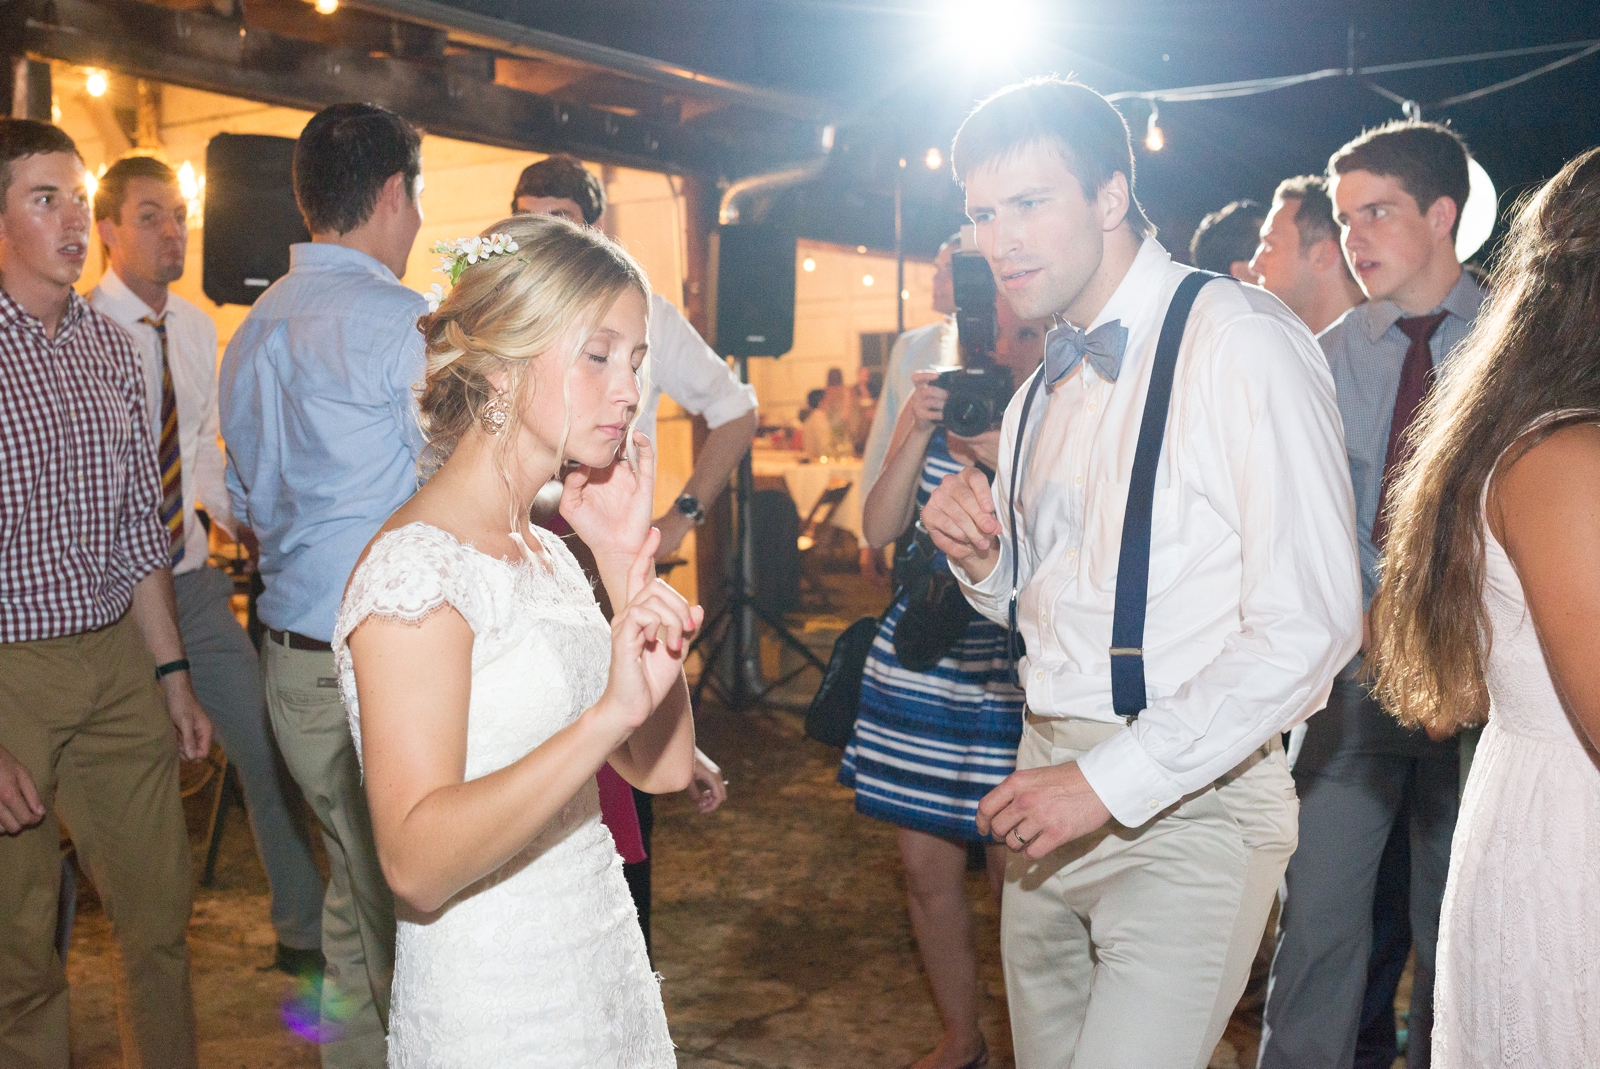
Just a few more photos to convince you how awesome it is! :) In all of these photos, the places I am shooting are COMPLETELY DARK. Most of the light you see is all from my flashes!
Hope this gives you some insight on how to rock reception photos! I definitely don’t know everything there is to know about flash, but I hope this is a good starting guide for anyone starting out in it like I am! :) Feel free to reach out if you have any questions!


I have a question – Regarding your off camera flash – in a typical dance floor/wedding setting, what do you set the zoom at for the flash on the light stand? I’m using Godox triggers. Thanks for any info!
Hey Matt! I typically leave it on auto, so it automatically adjusts for whatever lens I have on. However, I have noticed that when the zoom is on the wrong setting (for example, the flash is set to 85mm and I have a 35mm lens on my camera), I haven’t noticed any difference as far as how the flash works for me. Hopefully that helps! Let me know if you have any other questions! :)
Hi Stephanie! Thanks so much for sharing this, so helpful! We are in the process of learning how to use OCF. We have 2 flashes and 2 transceivers (the same as what you’ve listed above) and we are still having trouble using them both at the same time. If you have time, can you explain how to set it up for both, on camera and off camera flashes, to fire together? Thank you in advance!!
Hello! So glad it’s helpful! :) I would definitely recommend making sure both of the channels are on the same number and letter (for example, both on number “1” and letter “A”). This should fix your problem! If you’re still having issues, try playing around with the flash modes to get it to work. I usually have to have my off camera flash on “Multi” mode for it to fire! Hope this helps!! :) Let me know if you have any other questions!
Hi Stephanie, do you use any diffusers or modifiers on the off camera speedlites?
Hi Phil! Sometimes I’ll throw on a white umbrella to make the light softer and I feel like there’s enough room in the space at the reception. If I’m using flash for family formals (in a church) I always use my umbrella off camera! But for the most part, I just use bare flash! I am wanting to play around with it more, though, and am looking at getting some magmods to try!
Here’s the white umbrella I use: https://www.amazon.com/Neewer-Translucent-Umbrella-Studio-Shooting/dp/B01HTDGWYI/ref=sr_1_1?s=electronics&ie=UTF8&qid=1507160329&sr=1-1&keywords=Neewer+2+Pack+33%22%2F84cm+White+Translucent+Soft+Umbrella+for+Photo+and+Video+Studio+Shooting
Let me know if you have any other questions! :)
Thank you SO much for this. I seriously know nothing but I feel so much more confident on what to buy and how to use it. Question: what kind of camera do you use? or will the YN 568EX flash work on my D750? Or will that matter since I’ll have the trigger between the flash and the camera? I don’t want to buy the wrong one. (The description doesn’t list D750 as a compatible model so I’m just double checking.) Again, THANK YOU SO MUCH!!!!
Hi Alexandira!! SO HAPPY it helps! My camera body is a Nikon D750 and any Yongnuo flash that says it’s for Nikon should work!! All of the flashes I have linked above work on my D750. They all worked on my old camera as well, the Nikon D610. Hope this helps! Let me know if you have any other questions!! :) -Stephanie
This is amazing! Thank you so much for sharing. I am starting my first wedding season as the primary photographer and have been so intimidated by off camera flash, but this makes navigating so much easier. Im excited to set it all up and start testing it out!
Hey Heather! So happy to help, I’m so glad to help you navigate this tricky part of shooting!! Let me know if I can help ya out as you’re testing it out! <3 So excited for you and your new business! Have an amazing wedding season!!
This is so helpful, thank you! I have the same Yongnuo trigger. My question is do you just use the transceivers on the flashes? Don’t you need to use the transmitter? The transmitter doesn’t have a hot shoe on top.
Hi Emma! If you use the triggers I linked to in the post, you should only need one for each flash. They all have a hot shoe on top so you probably have different triggers! :)
Hey Stephanie! So, I’m looking into OCF (and really, an on-camera flash that’s more useable than my popup on my D750). I know you said it’s manual rather than auto … I’m a little intimidated by that. I don’t know much about flashes, but I have some indoor events coming up that I want to prepare for. Is there another version you would suggest that has auto settings, or do you think learning manual is worth it? I know you said 1/16 – 1/64 for your settings…but if I’m being honest, I have NO idea what this means! I actually had a YN flash that I used years ago but it appears to be dead and I remember nothing about using it. :P
Hey Stephanie!! :) GREAT question!!! I would definitely encourage you to not be intimidated! It’s actually super easy to use! When you turn the flash on, the first thing that automatically pops up is the option to change the flash power. You just use the arrow pad (left and right) to make it brighter/not as bright! It’s actually easier once you get the hang of it because the flash power will be the same and won’t change on you! :) Hope that helps! If you haven’t already, be sure to grab part 2 of this tutorial by filling out the form in the blog post. It explains a lot more of how I use the flash at weddings! :) you’ve got this!
Hi Stephanie! Thanks so much for creating these helpful posts! Really enjoyed this tutorial! Can you explain how you use the NEEWER Video Light?
Hey Vivian! :) So glad you love it! I use it a lot for sparkler exits!! It’s the best!
Hi Stephanie,
Thanks for this awesome post and insight into lighting a wedding. I am looking to start preparing to shoot OCF for some indoor events, and Weddings always intimidated me. However, your suggested items and steps have reassured me that I am going in the right direction. Question does the light stand have a place to insert the Umbrella, how does it stay put while you are shooting? Just curious.
Thanks!
Carlton
Hi Stephanie very helpful blog, thank you. I currently have a Canon Speedlite with the basic YONGNUO RF-603C-II-C3 trigger. I would like the ability to change the OCF power levels via the on camera controller as it’s not always convenient to pop over to the OCF to change the settings! . I’m currently looking at this -Yongnuo YN560-TX Trigger – but not sure whether it will be compatible with my Canon flash – do you have any experience with this model ?